MAGGIE
Magnetometer Probing Robot for Vacuum Chamber Inspection

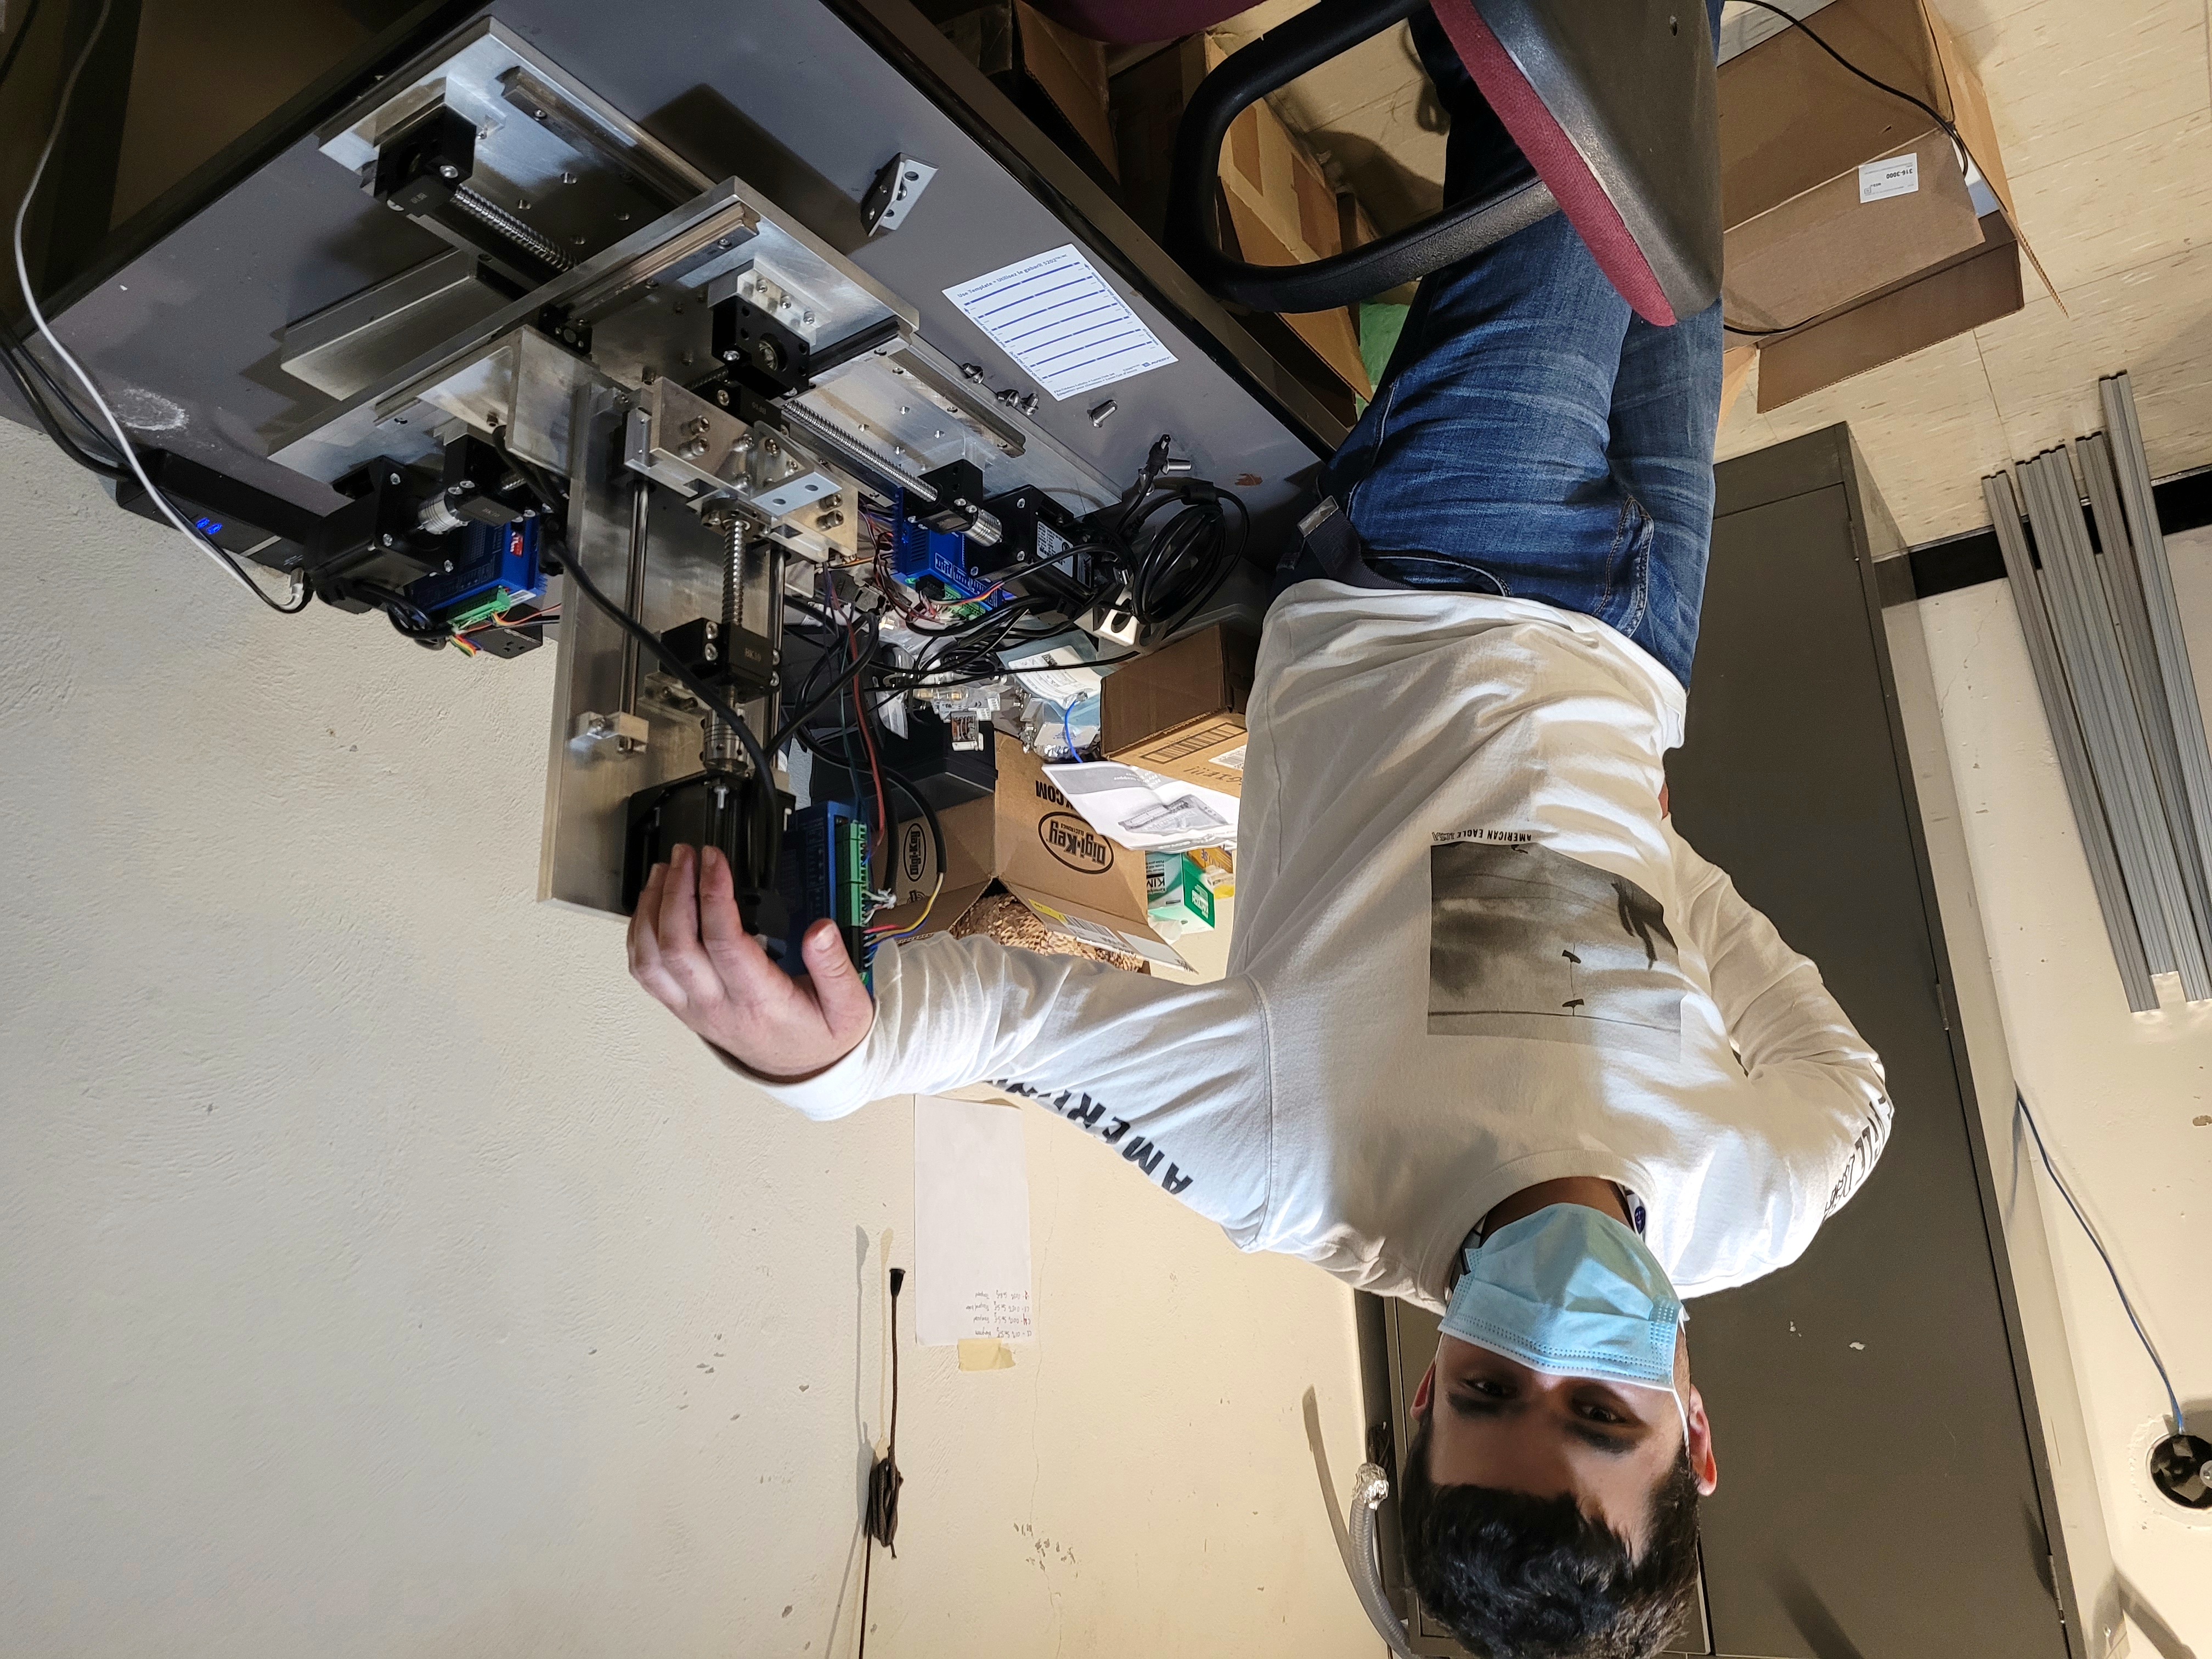
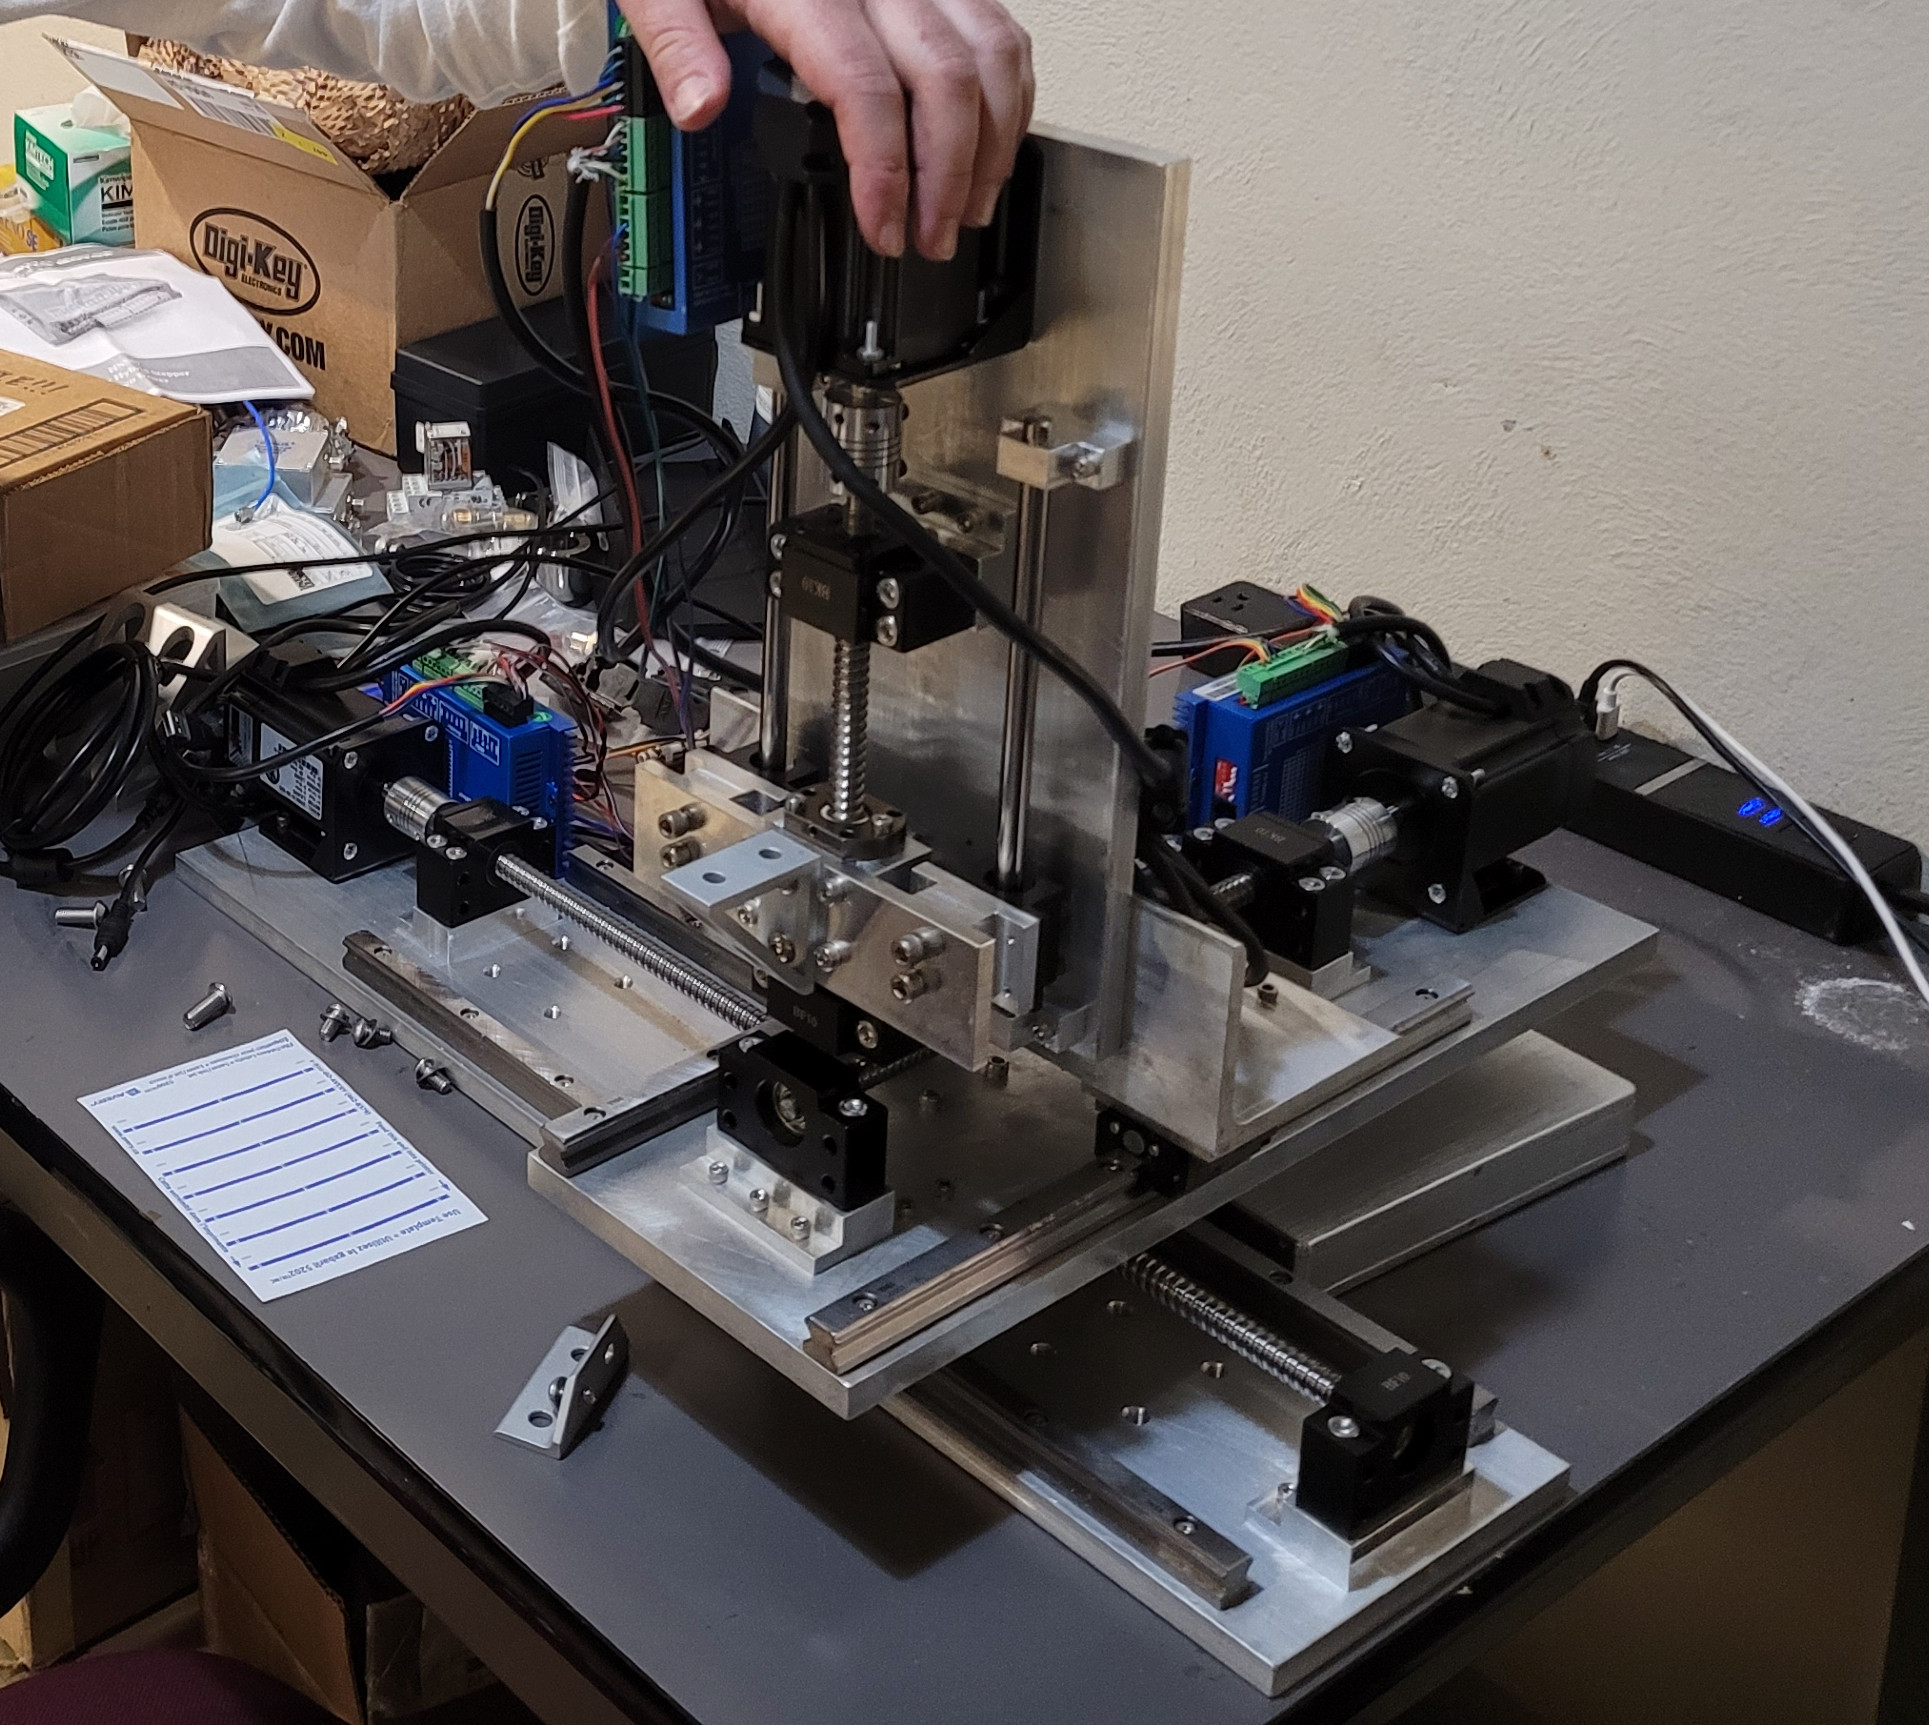
MAGGIE is a robot designed to probe the volume of a vacuum chamber to quantify the magnetic fields inside. This project was done over the course of my 8 month independent study course with Dr. Amar Vutha at VuthaLabs at the University of Toronto.
By measuring the magnetic fields present in the vacuum chamber, we will then be able to set up our cancelling magnetic field coils to cancel all external disturbances. The cancelling coils were designed using the Biot-Savart simulator.
I was in charge of all apsects of the project; mechanical, electrical and software. MAGGIE is designed as a gantry robot, made entirely out of aluminum parts to not impact the magnetic field readings and be durable. It uses a system of lead-screws and guide-rail/ball-bearing carriages to ensure high repeatabilities at sub 0.5 mm over the entire workspace.
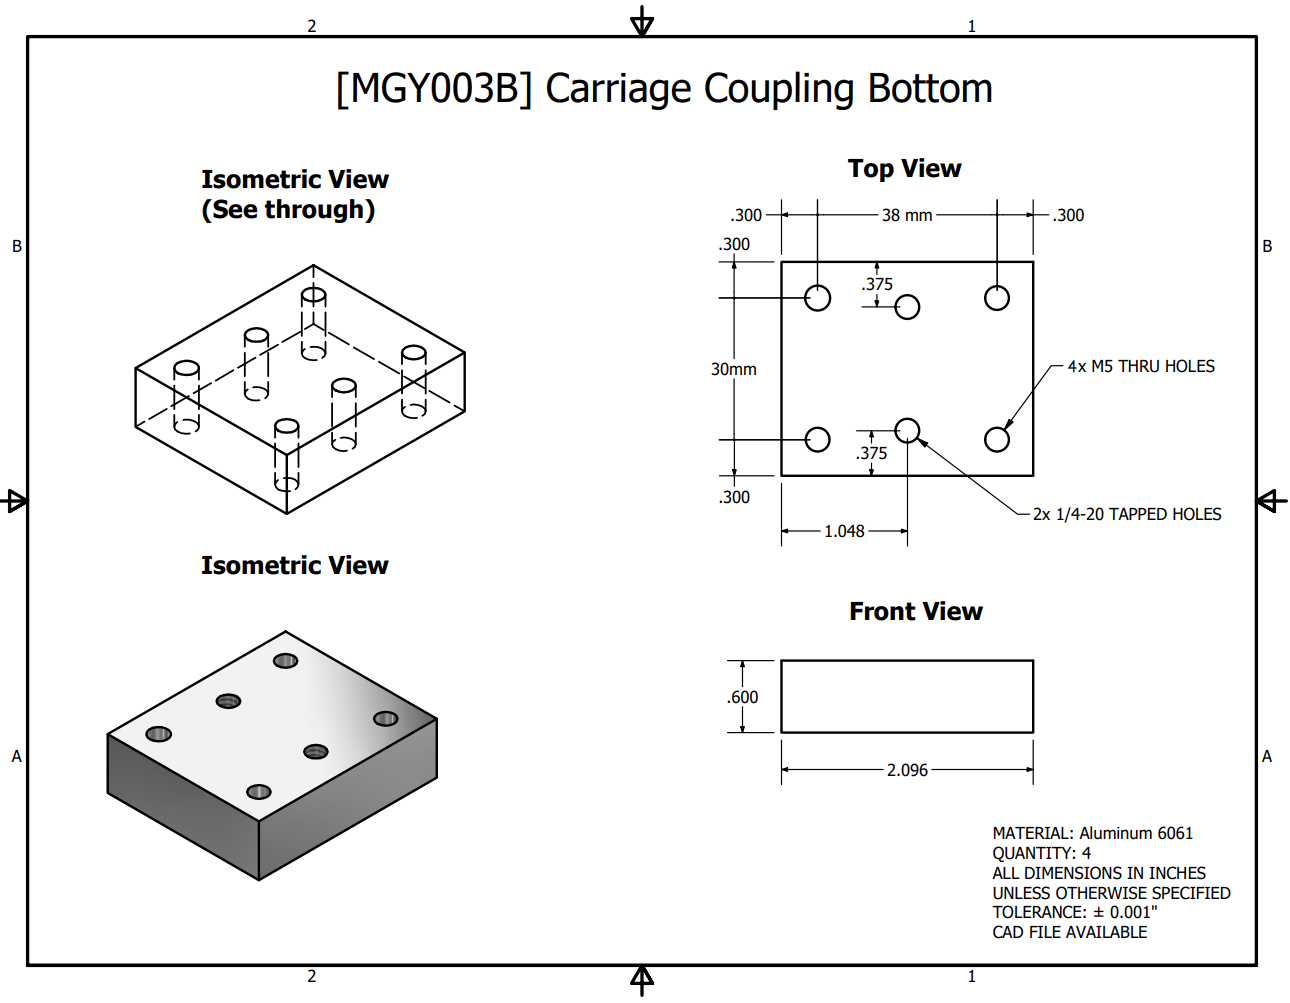
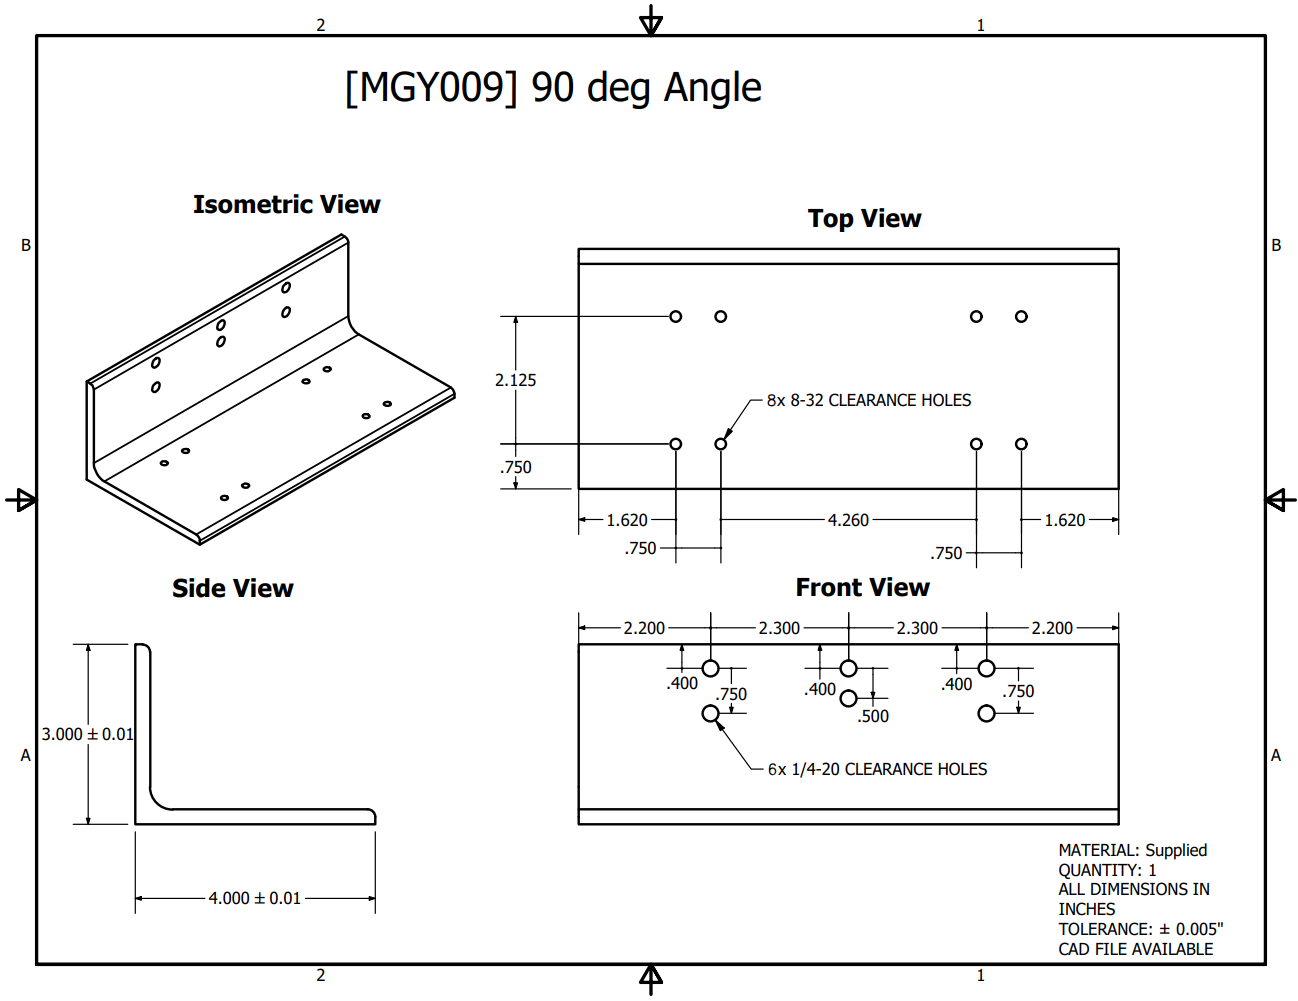
It was also entirely machined in house, some by me and others by the U of T physics machine shop. All parts are modular and interchangeable, enabling MAGGIE’s workspace to modified at will.
Simulations were performed to test MAGGIE’s modes of oscillation to quantify any sources of error. The magnetometer was callibrated by computing it’s Allan Variance. MAGGIE is powered using NEMA 23 stepper motors with built-in feedback loops using it’s encoders.


---
layout: page
title: project
description: a project with a background image
img: /assets/img/12.jpg
---


You can also put regular text between your rows of images. Say you wanted to write a little bit about your project before you posted the rest of the images. You describe how you toiled, sweated, bled for your project, and then… you reveal its glory in the next row of images.


The code is simple. Just wrap your images with <div class="col-sm"> and place them inside <div class="row"> (read more about the Bootstrap Grid system). To make images responsive, add img-fluid class to each; for rounded corners and shadows use rounded and z-depth-1 classes. Here’s the code for the last row of images above:
<div class="row justify-content-sm-center">
  <div class="col-sm-8 mt-3 mt-md-0">
    {% include figure.liquid path="assets/img/6.jpg" title="example image" class="img-fluid rounded z-depth-1" %}
  </div>
  <div class="col-sm-4 mt-3 mt-md-0">
    {% include figure.liquid path="assets/img/11.jpg" title="example image" class="img-fluid rounded z-depth-1" %}
  </div>
</div>